Verzorging/Care
Zien uw Dierama's er na de sneeuw en vorst helemaal bruin uit? Geen nood. Kijk hieronder onder het kopje "Na de winter.." voor advies.
Grondsoort
Doorlatende grond, zandgrond, matig voedselrijk. Droger in de winter (geen stagnerend vocht) en extra vocht geven in het voorjaar voor de vorming van de bloemstengels.
Bloeitijd en bloeiduur
De meeste soorten bloeien in de periode juni, juli, augustus (noordelijk halfrond). Bloeiduur is circa 4 tot 6 weken. De bloeiduur wordt langer naarmate er meer bloeiaren in de plant zitten.
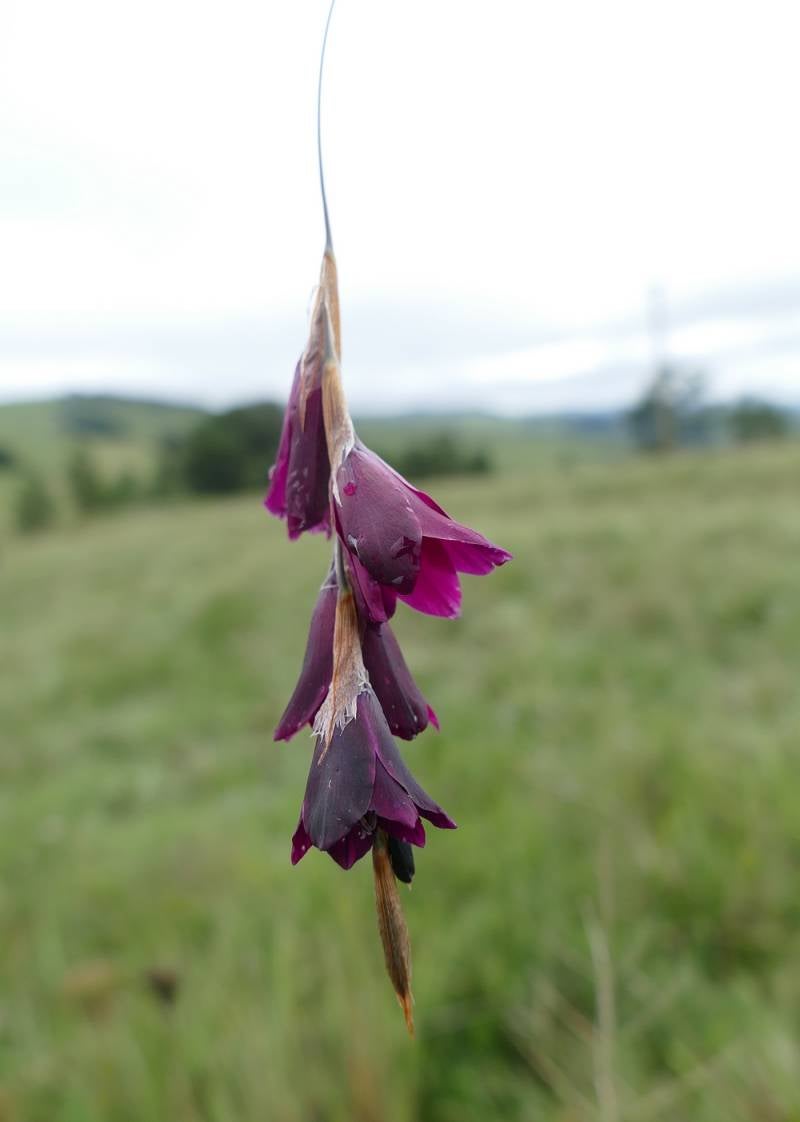
Dierama atrum Neil Potter Farm. Photo by Hans Huizing
Standplaats
Bij voorkeur zon of eventueel halfschaduw (dan schaduw in de morgen, zon in de middag). Dierama's houden van zon, maar niet van een droge, hete plek. Van nature komen de meeste soorten voor in grasland. Daarom heten ze in het Afrikaans ook "Grasklokkies".
Verzorging
Meng wat compost door de grond als je hem plant. Probeer de breekbare wortels zo weinig mogelijk te beschadigen. Zet de plant op de juiste diepte, zeker niet te ondiep.
In het voorjaar regelmatig wat extra water geven. Dat is noodzakelijk voor de aanmaak van bloemstengel. Ze komen van oorsprong uit een gebied met 'summer rainfall'.
Eventueel bemesten in het voorjaar. Niet te vaak en niet teveel! Geef organische mestkorrels met een wat hoger kaliumgehalte en weinig stikstof. Ik gebruik organische mest van DCM, N-P-K verhouding 6-4-10 + 2 Mg.
Voorkom dat de plant te nat staat in de winter. Het water moet weg kunnen lopen. Zandgrond is ideaal.
Eventueel wat blad om de plant heen duwen. Niet afdekken, het is een wintergroene plant en deze heeft in de winter ook licht nodig.
Na de winter...
Ziet uw plant er na deze toch eerst warme en later toch nog koude winter niet al te florissant uit?
Knip dan alleen het bruine blad af. Let daarbij goed op het centrum van de plant, want het kan maar zo zijn dat daar toch al iets groens zit. Knip ook alle dubbelgeknikte bladeren net onder de knik af.
Geef wat organische mest (niet teveel stikstof, ik gebruik zelf een verhouding van 6-4-10) en zorg dat de plant in het voorjaar voldoende water krijgt.
LET OP: Het kan zelfs tot juni duren voordat er nog een nieuwe scheut uit het knolletje naar boven komt, dus geef niet te snel op.
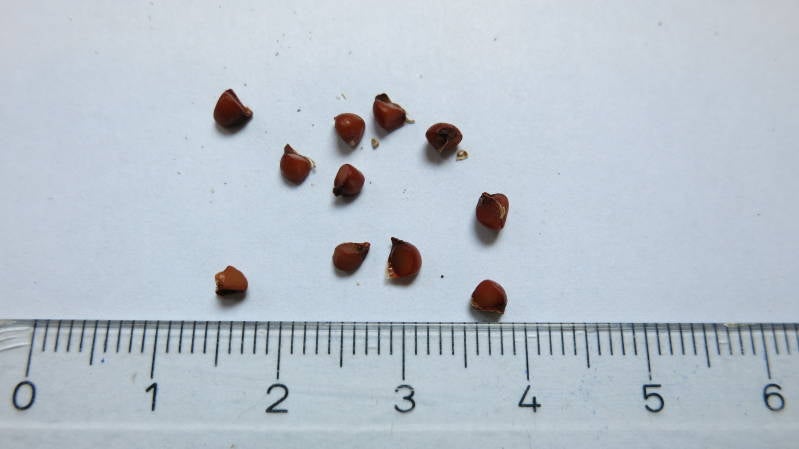
Zaden van Dierama pulcherrimum/Seeds from Dierama pulcherrimum
Vermeerderen
Door zaaien of delen.
Zaaien
Zaai vanaf februari binnen voor in zaai- en stekgrond (doorlatend en met weinig voeding). Zaai oppervlakkig, dek de zaden af met een dun laagje compost of wat grit.
Gezonde, verse zaden zijn roodbruin van kleur en zijn goed kiemkrachtig. Zijn ze te oud, dan worden ze steeds donkerder en zullen ze minder snel of helemaal niet ontkiemen.
De eerste plantjes zullen al na twee weken ontkiemen. Verspeen ze redelijk snel, het is van belang dat ze blijven groeien. Zet ze in diepe potten, want ze wortelen diep en gebruik bij voorkeur potgrond die een niet al te hoog stikstofgehalte bezit.
Zaailingen moeten het eerste jaar vorstvrij overwinteren.
Delen
Neem de plant voorzichtig op na de bloei. Probeer daarbij de wortels zo weinig mogelijk te beschadigen. De knolletjes zijn gemakkelijk van elkaar te halen als je de meeste grond ervan hebt verwijderd. Zet ze op de juiste diepte op de nieuwe plek en strooi wat compost om de basis. Geef op tijd water, uitdrogen is funest.
Na het delen zal de plant meestal het eerste jaar niet bloeien.
Do your Dierama's look brown after the snow and frost? Don't worry. Look below under the "After the winter" for advice.
Soil type
Drained soil, sandy soil, moderately rich in nutrients. Dryer in winter and extra water in spring for the formation of the flowering stems.
Flowering time and flowering period
Most species bloom in June, July or August (Northern Hemisphere). Flowering period is about 4 to 6 weeks. The flowering period becomes longer when there are more flowering stems.
Site
Preferably a sunny position or partial shade (with shade in the morning, sun in the afternoon). Dierama's like sun, but they don't like a dry, hot spot. Most species grow in grassland. That's why they are named "Grasklokkies" in Afrikaans.
Care
Mix some compost through the soil if you plant it. Try to damage the brittle roots as little as possible. Put the plant in the right depth, certainly not too shallow.
Water regularly in spring. This is necessary for the making of the flowering stems. They originate from an area with summer rainfall.
Fertilize in spring. Not too often and not too much. Give an organic fertilizer with a higher level of potassium and not too much nitrogen.
Prevent the plant from getting waterlogged in winter. Do not cover, it's an evergreen plant and it needs light in winter as well.
After the winter...
Does your plant look bad after winter?
Cut only the brown leaves away. Pay attention that the heart of the plant may show some green already, so take a good look before you cut. Cut leaves that are bend and broken just below the place where it is broken.
Give some organic feed (not to much nitrogen, I use a combination of 6-4-10) and make sure the plant is watered well in spring.
ATTENTION: It can take until June before you see a new shoot, so don't give up too soon.
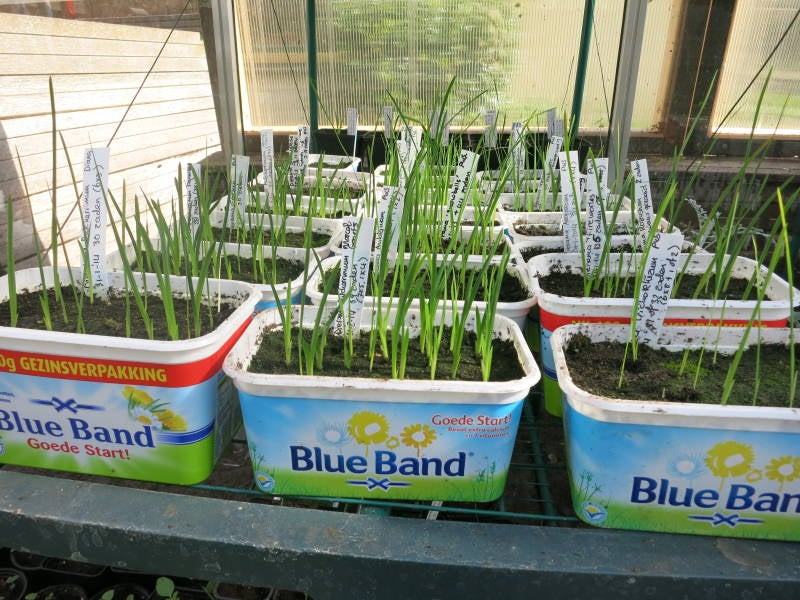
Zaailingen, ongeveer 6 weken oud/Seedlings, about 6 weeks old. Photo by Giny de Jong
Propagation
By sowing or division.
Sowing
Sow indoors in February in seeds compost (well drained and low in nutrition). Sow superficial, cover the seeds with a thin layer of compost or some grit. Healthy, fresh seeds are reddish brown and germinate quickly. Is they are too old, they are getting darker and they will germinate slowly or not at all.
The first plants will germinate after just two weeks. Prick out seedlings when they have their true leaves, it is important that they continue to grow. Put them in deep pots, because they root deep. Use potting soil that is low in nitrogen and a bit higher in potassium.
The first year the seedlings must be kept frost-free.
Division
Dig out the plant carefully after flowering. Try to damage the brittle roots as little as possible. The corms are easy to divide after you have removed most of the soil. Put them in the right depth at the new place and sprinkle some compost around the base. Water in time, don't let them dry out completely.
After division, the plant will probably not flower the next year.